- When you go to the Hexographer software page, you’ll see something like a larger version of the picture to the right in the middle of the the software page. The software isn’t downloaded and installed on your computer, it runs in the web page and pops up new windows as it needs to. (The pro version is downloaded and “installed” on your computer.) If you don’t see something like the picture to the right, your computer needs Java installed or updated. Go to http://www.java.com/getjava
- We want a very small map for the tutorial, so set the width to 15 hexes by either typing “15” in the box next to “Width” or using the arrows next to the box to set the value to 15. Set the height to 10 hexes using the box or arrows next to “Height.” “Hex Width” and “Hex Height” can be left as is. These control the size of the individual hexes. You can change these values later if you wish as you edit your map.
- Set the “Terrain Settings” set to “Solid Terrain” and under that leave the terrain type as “Blank.” Hexographer can generate random terrain that is somewhat sensible (hills are next to mountains, deserts rarely have a heavy forest in the middle, etc. “Normal Terrain” results in a map that is about half ocean. The “Many Islands” option creates a map that is mostly ocean and the “Few Oceans” option creates a map that is mostly different landforms. “Custom Terrain” will pop up a window so you may customize the frequency of each main terrain type. (This will be described later.) But “Blank Terrain” will create a blank map which some people find easier to work with if they have a clear idea of their map. And it lets us show off the terrain wizard.
- The “Map Orientation” drop-down selector allows you to change the orientation of your map. There are two choices: you can have your hexes in nice, true vertical columns but your rows will zig-zag due to the hex shape or you can have true horizontal rows but your columns will zig-zag. For this tutorial you can leave it set as “True Columns.”
- Another option is to “Import a Map.” This will allow you to place a map under your map so you can easily trace it by setting the opacity of your map to see under your map as you trace. That will be a different tutorial topic that isn’t written yet. For this tutorial, you can leave this blank. (“None Set”)
- Click “Generate Map” and the software will open a new large window that will display your map. (The “Load Map” button allows you to open an existing Hexographer map file.)
Initial Map
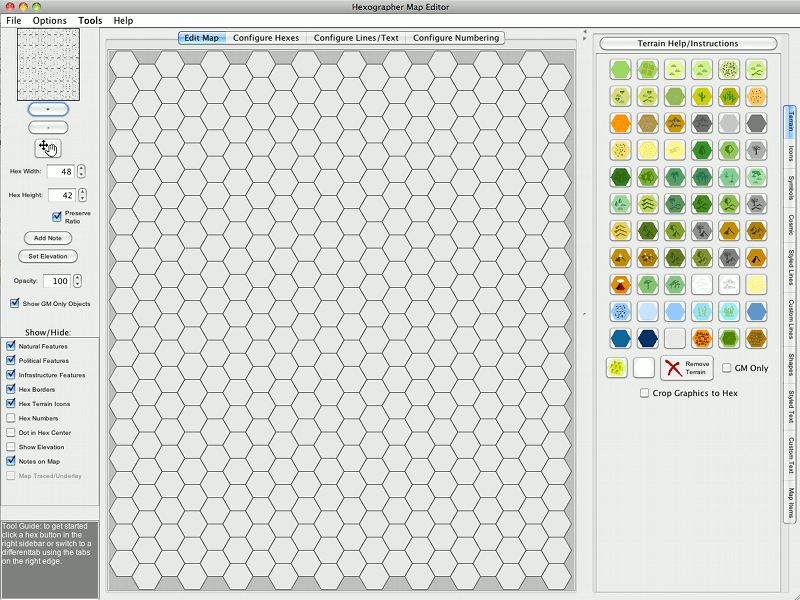 Now you should see a new window with a blank hex map in the center, like the one above. To the right of your the map are several terrain hex buttons. In the upper left of the window are traditional software application menus such as File, Options, and Help. To the left of the map is a minimap view (updated every 5 seconds) which allows you to see the map area you’re viewing in the context of the larger map and pan it as well as a few selectors to change the size of your hexes (effectively allowing you to zoom in and out, a selector for change the opacity of your map (in case you are tracing another graphic), toggle some features on/off, etc.
Changing Terrain and Adding Features
- Simply select the terrain type you want by clicking the terrain button on the left, then click a hex on the map. It will switch to that type.
- You can also click and drag over several terrain hexes on the map to change the terrain into the selected hex terrain. Give it a try.
Running the Terrain Wizard
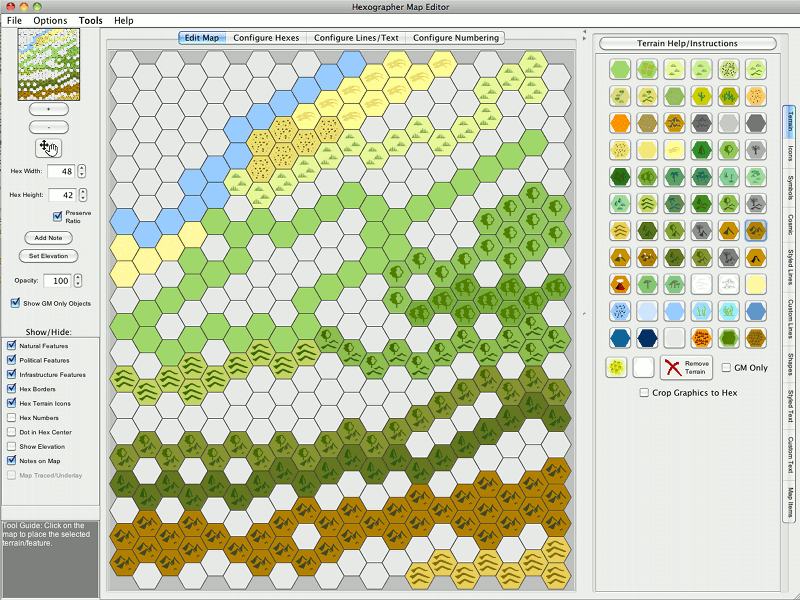
- Make a rough sketch of your map. It doesn’t need to be complete. You can simply draw a oval of forest in the top right, two lines of mountains in the middle, a line of sea across the top, etc. The map above shows an example.
- Then go to the “Tools” menu and select “Run Terrain Wizard.” You’ll get a map like the one below. The terrain wizard simple fills each blank hex with the nearest terrain type from your map sketch/skeleton.
- If you don’t like the map after the terrain wizard, go back to the “Tools” menu and select “Undo/Redo Last Terrain Wizard”.
- Tweak your map so the wizard will give you a result closer to what you have in mind.
- There is also a menu item to add some randomness to the wizard.

Adding Features
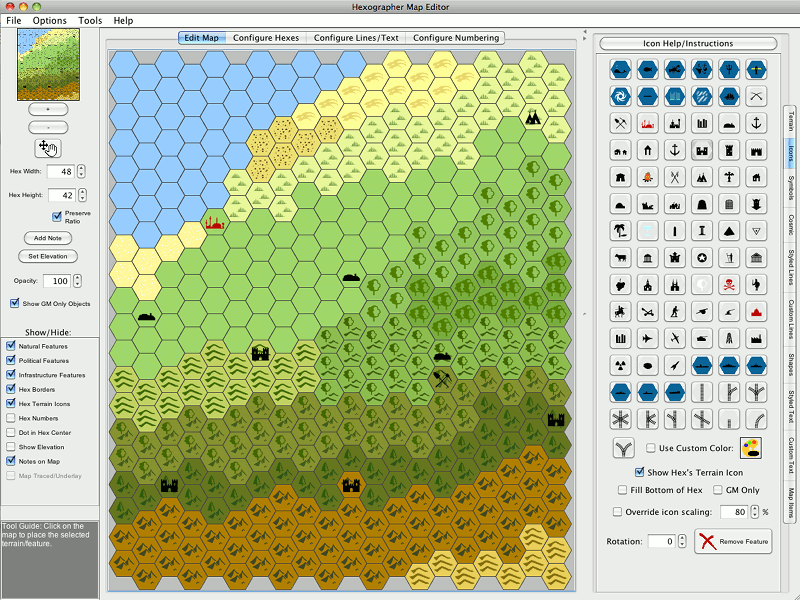
Features are icons for things like castles, cities, ruins, etc.
- Click to the “Features” tab on the far right.
- Click the desired feature, then click a hex on the map to place it.
- By default, these are centered in the hex to match the classic style. However, you may go the the “Options” menu and select “Feature Placement.” You may switch the placement style to be “Snap to Even Spots” or “Freeform”. (One-to-one is the default which centers the feature in a hex.) Snap to even spots calculates specific places in the hex to center the feature. It is more often used for mapping other things. Freeform however is intended for world/region mapping and it lets you place a feature more exactly.
Drawing Coastlines
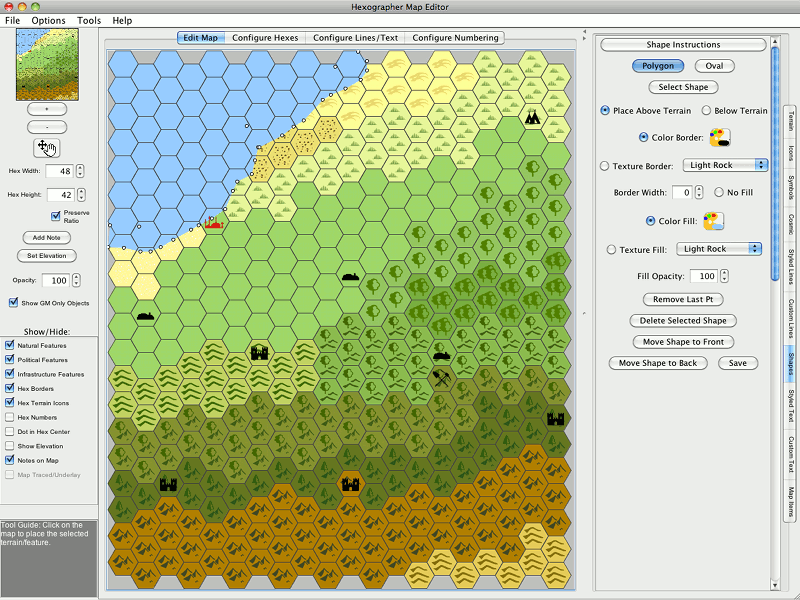
Previously one could draw coastlines by using lines to cover up portions of hexes. However, Hexographer now has shape objects which are more effective.
- Go to the “Shapes†tab/toolbox on the right side.
- Create a polygon for the sea by clicking then “Polygon†button; leave “above terrain†selected; set the border width to “0″; and set the color fill to “Sea†by clicking on the painter’s palette icon and selecting the “Sea†color in the dialog and save.
- Finally, click and drag on your map to draw the polygon. Note that the area filled may briefly not be correct if you are drawing the concave part of a polygon.
- Also note that little dots appear with each point. These will disappear when you move to your next shape or to your next task.
- Click the “Save†button at the bottom of the “Shapes†toolbox to start another sea area.
Drawing Lines
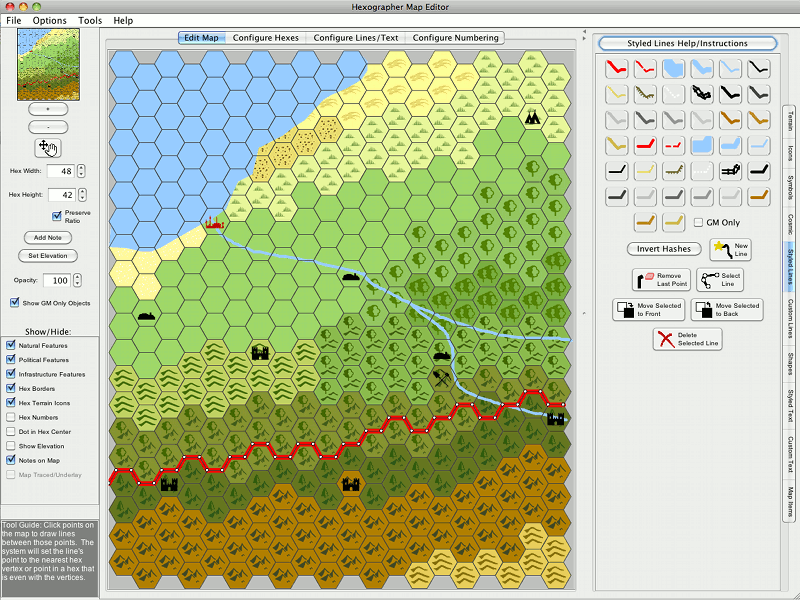
- To draw most lines, go to the “Styled Lines” tab on the far right.
- Select the line button that matches the type of line you wish to draw. Every type of line (road, river, political boundary, etc.) has two method-types: freeform and snap to vertex. Snap to vertex lines are drawn by clicking point to point and they will snap to the closest hex vertex to where you click. (They also can snap to the even halves and quarters of the hexes.) Freeform lines are dragged and points are added to the map as you move your mouse.
- I suggest you do your natural lines (rivers) then your infrastructure lines (roads) and finally political lines. But you can always reorder them by selecting a line and moving it to the top or bottom.
- Finally, you can add lines of arbitrary colors and thicknesses using the freehand and snap-to-vertex line buttons. Click the “Custom Lines” tab on the far right. These work in the same way and the other line buttons respectively but each time you draw a line, it can be a different color or thickness. When you add lines in this way, you should check the “Natural,” “Political,” or “Infrastructure” checkboxes as appropriate so those lines can be included in the chosen set of features. Once you select one of the two line buttons beneath the map, you will see a line color chooser, line thickness chooser, new line button, and remove last point button to the right of the “Delete” button.
Drawing Text/Adding labels
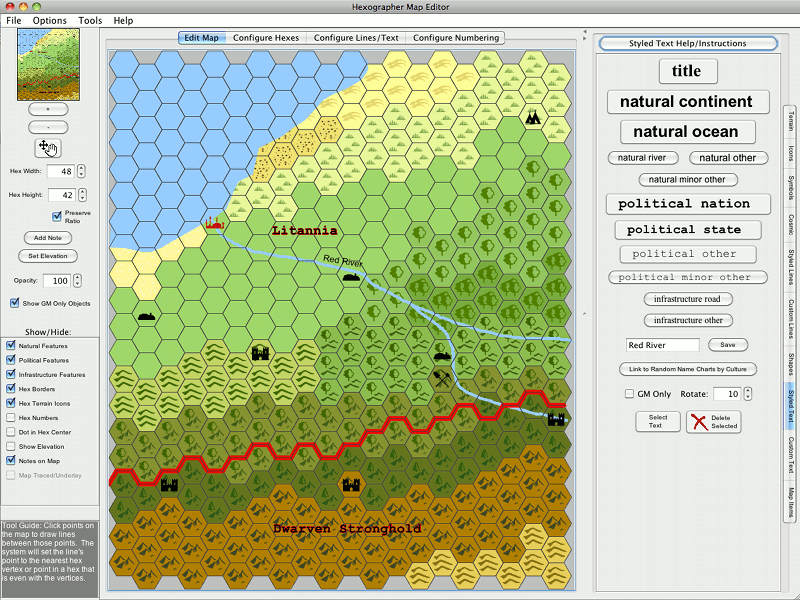
- To add text or labels to the map, click on the “Styled Text” tab on the far right. Like lines, text is divided into two types: Styled Text and Custom Text. Click the button that most closely matches the category of the text you wish to place. For example, if you wish to label a Mountain range, choose “Other Natural.” Adding the text using these buttons allows them to be grouped together so that you can change the font/color/style/size of all “river” text uniformly. (However, if you don’t want to do that or you want many variations of text, you may click the “Custom Text” tab. More below.)
- Next, type in the textbox next to the buttons the text you wish to add to the map.
- Finally, click on the map approximately where you want the text to appear. Note that where you click will be the bottom left hand corner of the text. You may move the text you added by clicking on the text and dragging it. (Click near the bottom of the first letter of the text.) For best results, you may have to drag the text slowly.
- If you don’t like the font, style, size or color of styled text, see the “Customize Line/Text Settings” section below.
- To Delete any text, click the “Select Text” button, click the little yellow square next to the text you wish to delete, then click the “Delete Text.”
- If you choose the “Custom Text” tab, you’re choosing to not make the text you are about to add part of a group. If you wish to change the font/color/style/size of the text later, you’ll have to delete the text and then re-create it with the new settings.
- In any case, to add custom text, you need to click the “T” button on the “Custom Text” tab. Then enter your desired text in the textbox. Change the font color, font face, size and style using those controls respectively. Note that the size is relative to the height of your hexes. It isn’t a true point size. If you enlarge your hexes, the text will grow proportionately to the height of the hexes. The text will stay in the same area of your map.
- Keep in mind that once you add text to the map it will change if you change any of the font settings or the the text in the textbox. In this way you can see how changes will look in a “live” fashion. If you wish to move on to another text, click the “Save” button to the right of the font selectors. Clicking on the map again will also stop the edits to the text you were editing and start edits to the new text added to the map when you clicked the map again.
Now you may have a map that looks something like the one above.
Customizing the Look
There are several sets of display options available in the Hexographer software:
- Go to the “Show/Hide” area in the right sidebar and uncheck/recheck the “Show Natural Features,” “Show Political Features” and “Show Infrastructure Features” menu checkboxes. Using these options allows you to see less cluttered versions of you map when you don’t care or need some of the lines and text on the map.
- Also in the “Show/Hide” area, you may turn off the hex borders using the “Show hex borders” menu checkbox.
- Another “Show/Hide” checkbox is “Show terrain icons.” Unchecking this turns off the icons used to signify terrain (the upside down “V”s for mountains, the trees for forests, etc.) Some people like a look where the terrain is signified only by hex color.
- Yet another “Show/Hide” checkbox is “Number hexes.” Checking this will display a unique number in each hex. The default is to list the column then the number with a period in between and to start with “00” for each and to place them in the bottom of each hex, but each of these features is customizable on the “Settings” window (see below) as well as the font used for the hex numbers.